
Accessing CueLink on a Remote Device
Introduction
CueLink allows devices on the local network - such as Macs, PCs, tablets and smartphones - to access ADR Cue events on the current active Cue Pro Timeline live. This enables any authorised participant in the recording session to follow the current cue being recorded on their own device through a web browser of their choice, without the need for any additional software.
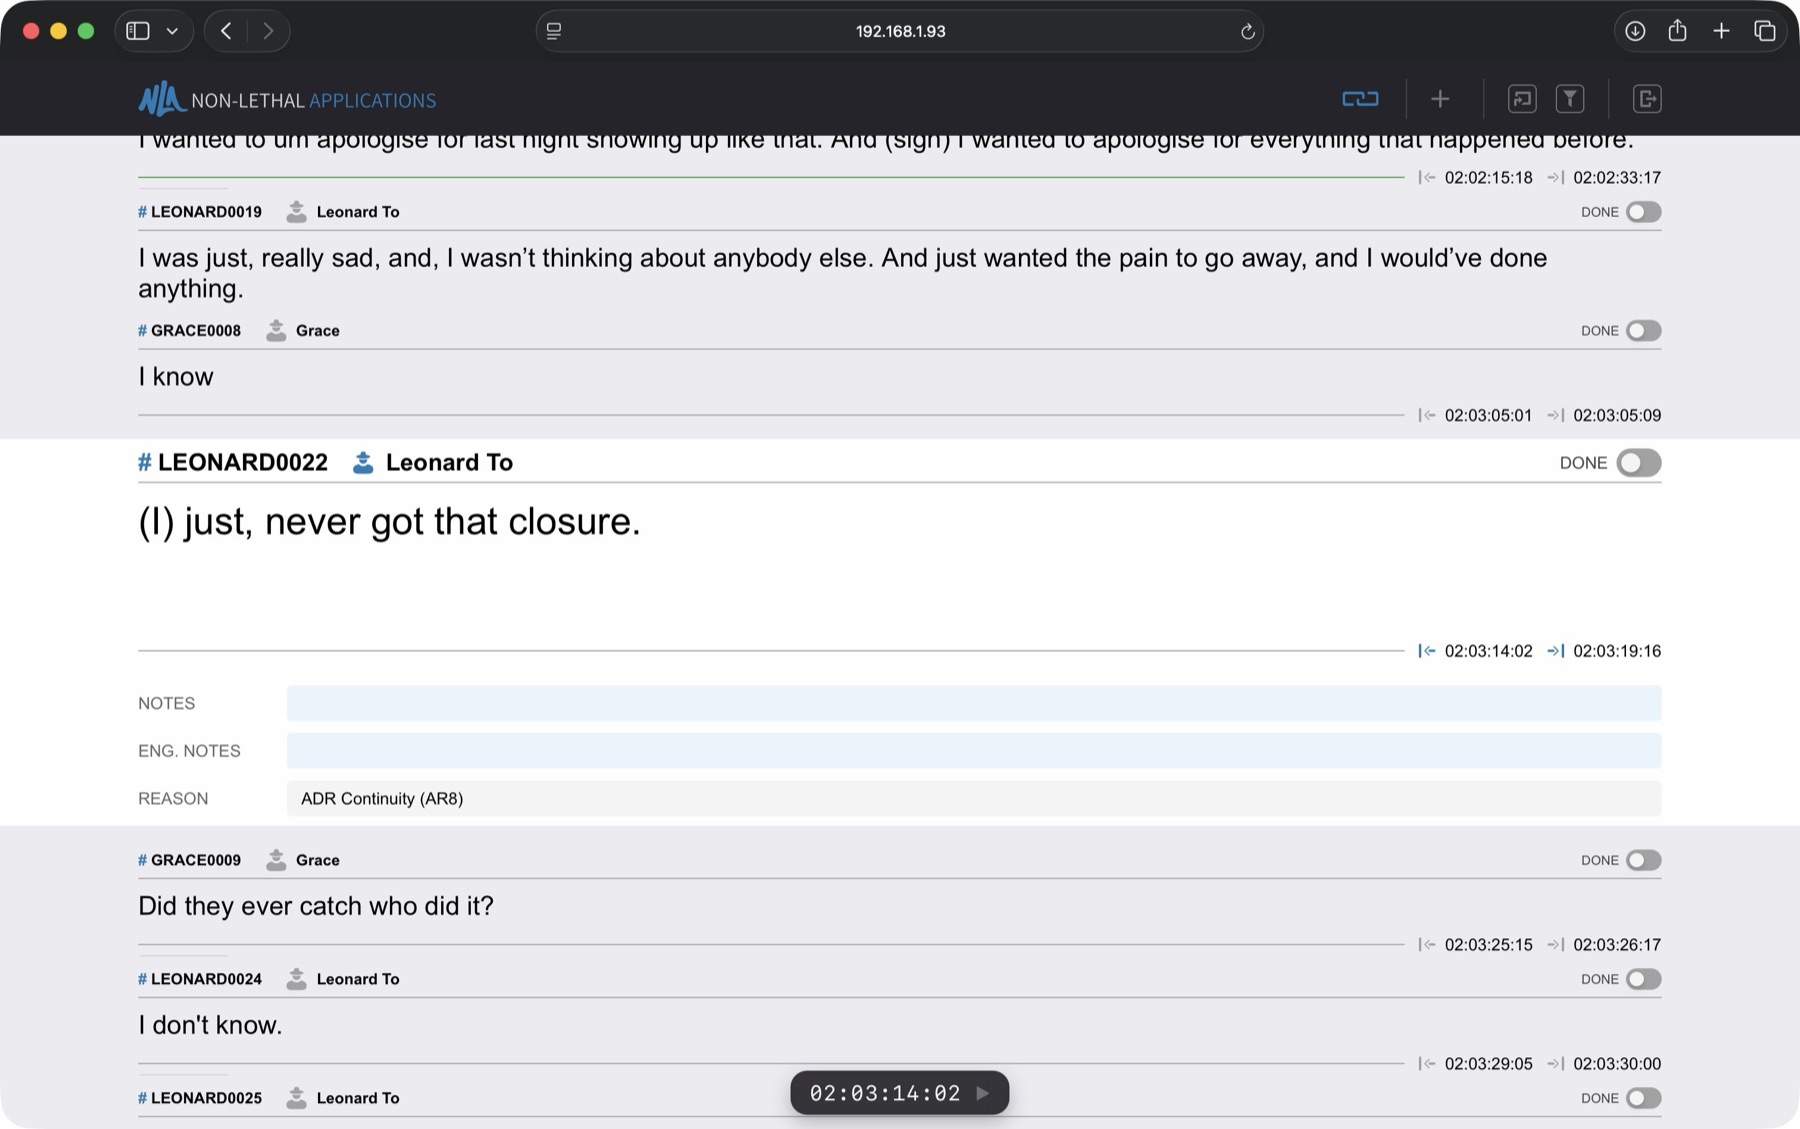
Participants who have been granted Editor privileges - for example the Director or Dialogue Editor / Supervisor - can also make changes to the current cue (or any other cue) on their devices. Any changes made are immediately updated on the displayed ADR Cue video overlays in Cue Pro. With Cue Pro Studio, Editor users also have access to the Timeline View - a full timeline editor in the browser where cues can be moved, retimed, split, merged and edited by dragging and clicking, with Playhead Control allowing direct manipulation of Cue Pro's playhead from the remote device.
CueLink has been designed to be especially user-friendly and intuitive to operate on external devices, with no or minimal explanation needed. For information on setting up and starting CueLink from the Cue Pro computer, see the CueLink Setup chapter.
CueLink Login
An active CueLink session can be joined on a device by one of three methods:
For mobile phone and tablet users, the quickest method is scanning the QR code (accessed by clicking the Show QR Code button in the CueLink setup window on the Cue Pro computer). Point the device camera at the QR code and once the QR code is recognised, tap the link button which appears. This will instantly open the CueLink login page in the default web browser.
Alternatively, click the URL shared in an email or messenger app by the engineer (via the Copy URL button on the Cue Pro computer). This will instantly open the CueLink login page in the default web browser. If the link does not work, try copying and pasting it into a web browser manually.
The last method is to open a standard web browser, navigate to
the address bar, and type the address supplied by the engineer
operating the Cue Pro computer. This is in the format
http://(IP address):(port number) - for example,
http://192.168.0.166:8989.
Note: The login address will not be the same when working in a different theatre at the same facility from one previously connected to.
To access CueLink in a browser on the same computer running Cue Pro, click the URL button shown in the blue box to the left of the Copy URL button in the CueLink setup window.
If the address is correct, the login window will appear.
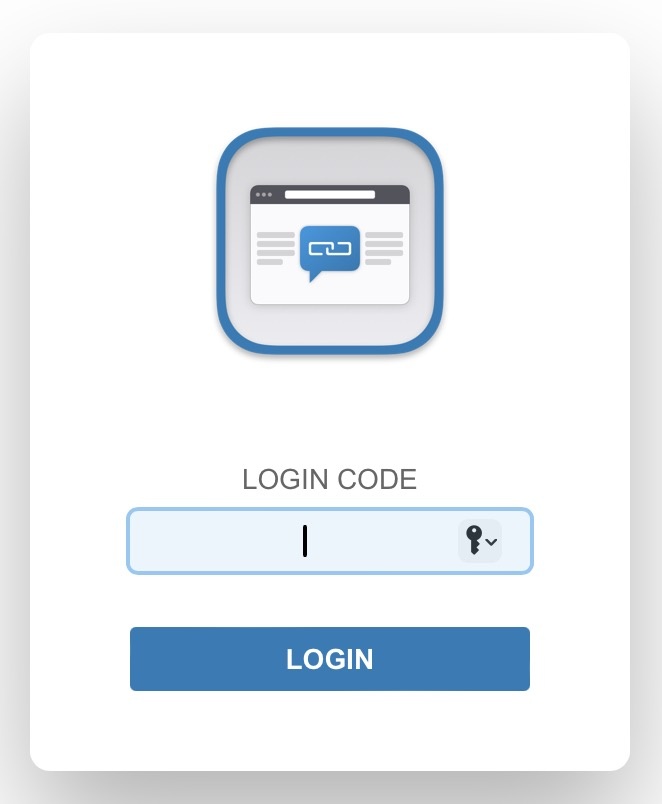
Enter the Login code supplied by the engineer operating the Cue Pro computer and press enter. Upon logging in, the main CueLink interface will be presented.
Note: If changes are made to user settings (such as role or filter permissions) during a session, log out and log back in for the updated settings to take effect.
The Event List
The event list displays all ADR Cues from the active Timeline in Cue Pro. The list scrolls continuously - scroll with a finger, trackpad, or mouse wheel to move through cues.
The currently active cue - the one under Cue Pro's playhead - is displayed as an enlarged row with the full text and all fields visible. Inactive cues are displayed in a compact layout so that more cues are visible on screen at once. As the playhead moves between cues in Cue Pro, the enlarged layout shifts to the new active cue and the surrounding rows compact again automatically.
Each cue displays its Cue Number, Character name, Actor name and Text. The Notes, Engineering Notes, Reason and Alt Text fields are shown in popovers - click on them to view their contents. The Alt Text field is read-only for all CueLink users and cannot be edited from the browser.
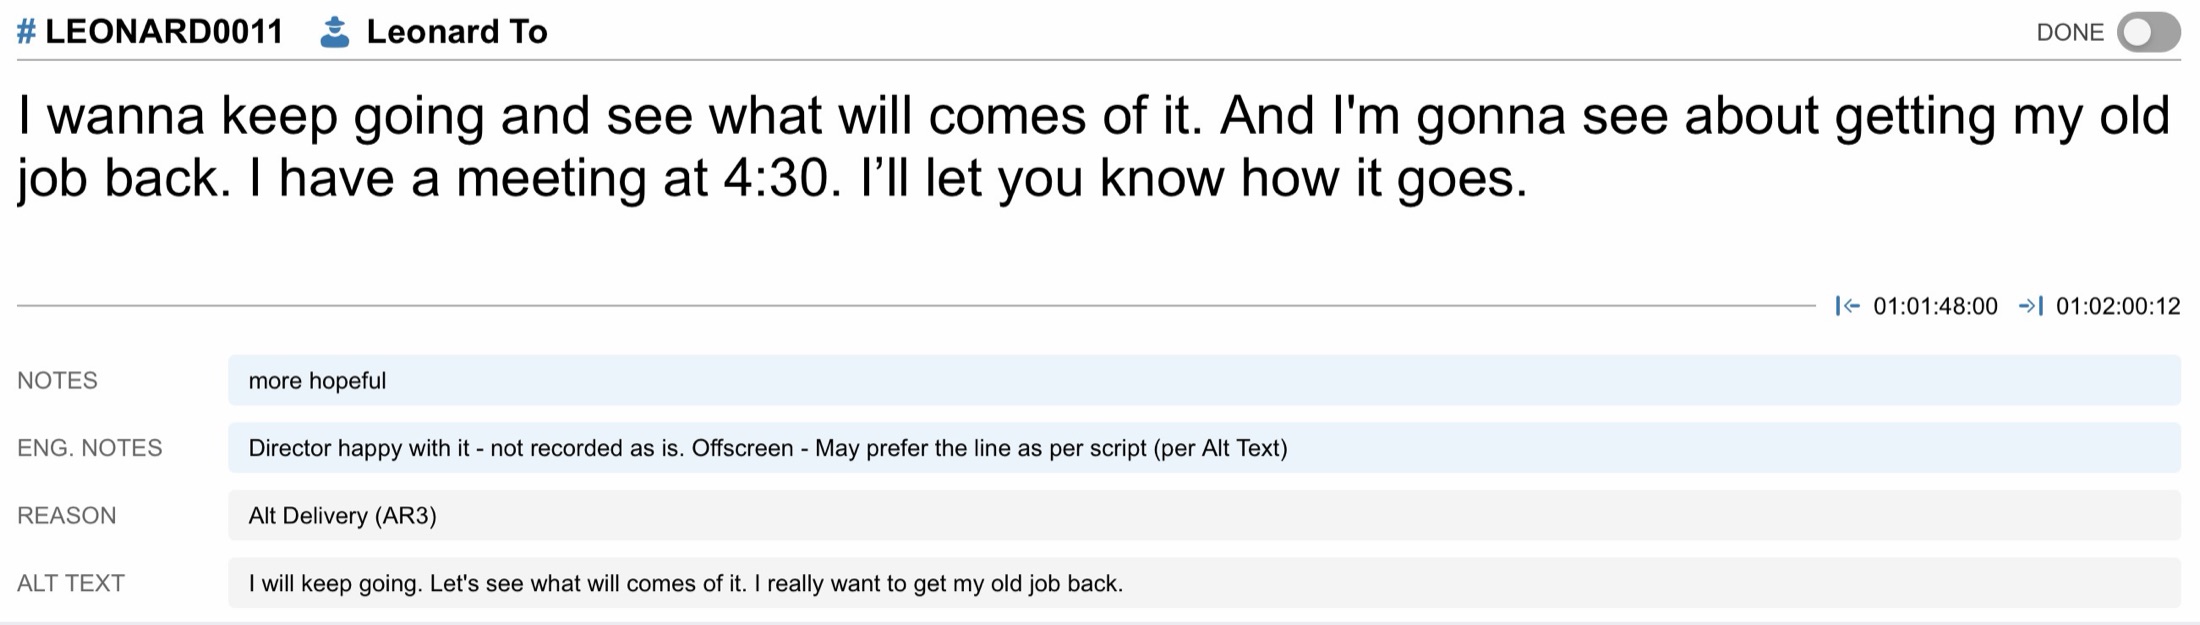
Each cue also has a Done switch. When toggled on, the cue is marked as complete and the same Done state appears in Cue Pro's Event List. For Viewer users, the Done switch is visible but read-only.
Note: Editing features such as Done toggling, text editing and timecode editing are available in Cue Pro Studio. See the Editing ADR Cue Fields section below for details.
Timeline View
Available in: Cue Pro Studio
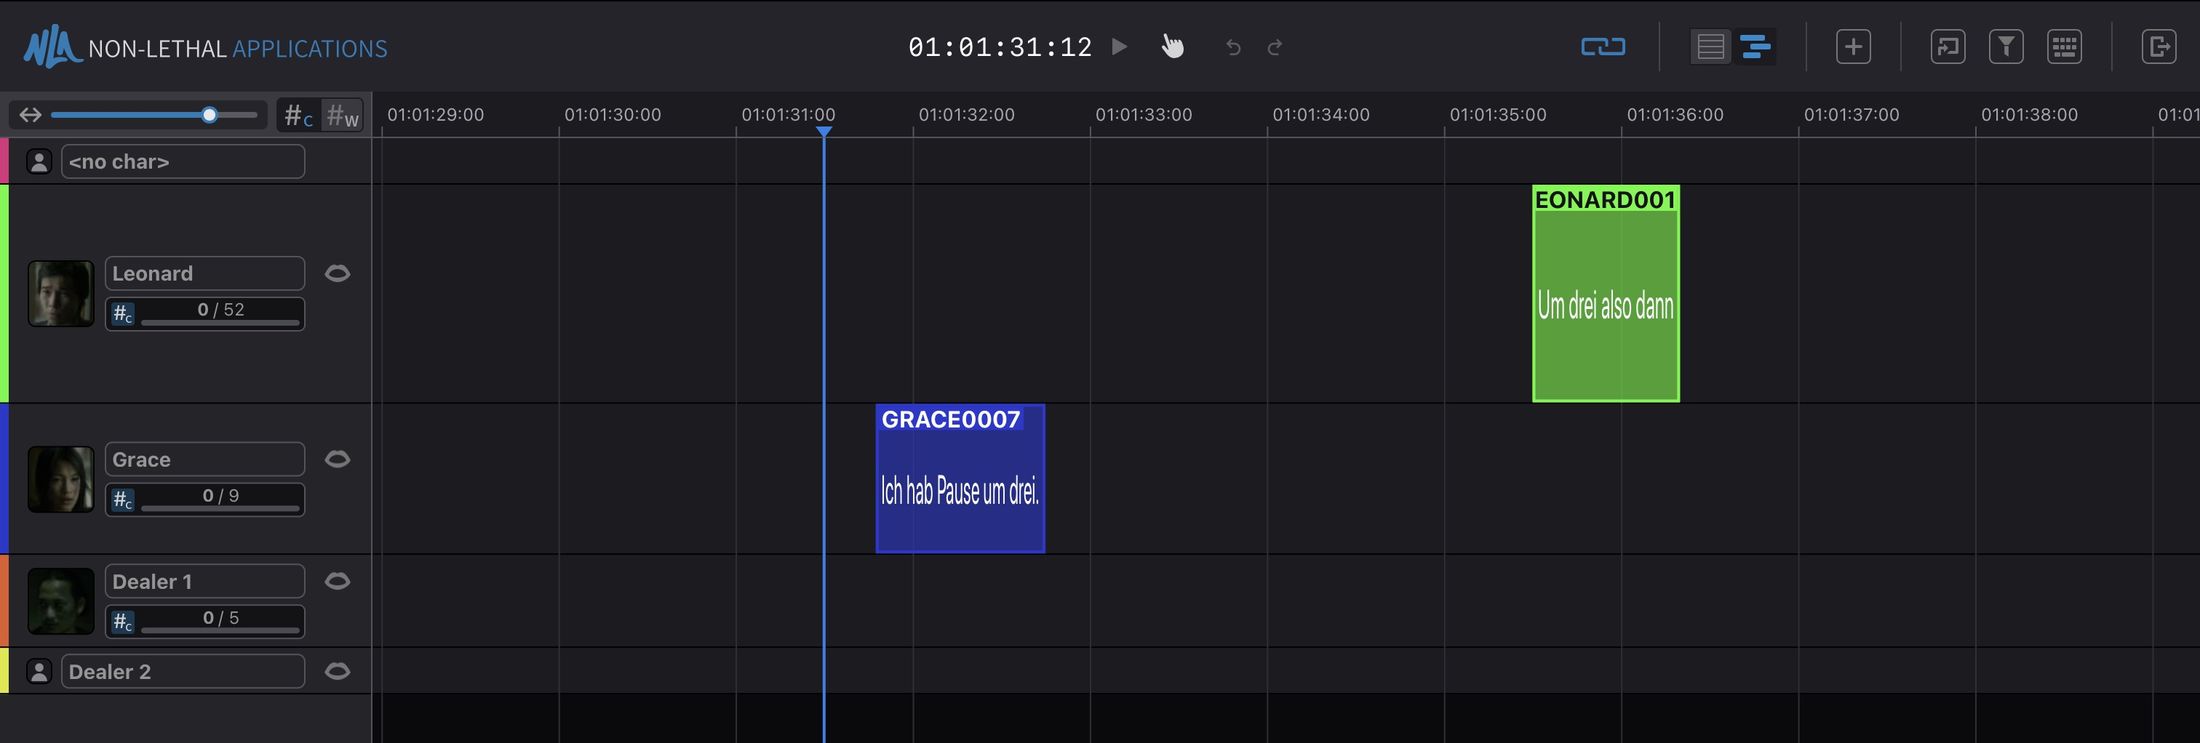
Besides the event list, CueLink offers a Timeline View for users with the Editor role: the ADR Cues of the active Cue Pro Timeline laid out on character tracks, the same way they appear in Cue Pro itself. Cues can be moved, retimed, split, merged and edited by dragging and clicking directly in the browser, with every change applied in Cue Pro immediately and visible to all other connected CueLink users.
The Timeline View is intended for a Dialogue Editor or Supervisor working on an iPad or a laptop during the session, spotting and adjusting cues while the engineer keeps running Pro Tools® and Cue Pro. It is available on iPad-sized screens and larger; on phones CueLink always shows the event list.
Switching Between List and Timeline
The two buttons in the header switch between the List and Timeline views.
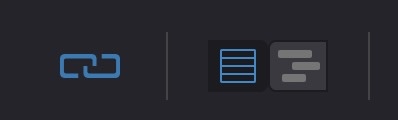
The choice is remembered on the device, so CueLink reopens in the view last used.
Viewers do not have the Timeline View and always see the event list.
Playhead Control
Cue Pro always owns the playhead. Anything in the Timeline View that moves the picture or the timing of a cue requires Playhead Control first: moving the playhead, moving or retiming cues, editing anchors, merging and splitting.
To take Playhead Control, press E or click the playhead control indicator in the transport bar.
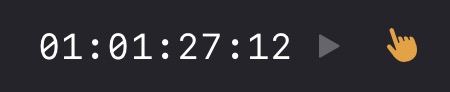
The indicator turns amber while the device holds control, and the CueLink icon in Cue Pro's Controller Bar changes as well, with the name of the controlling user shown in its tooltip.
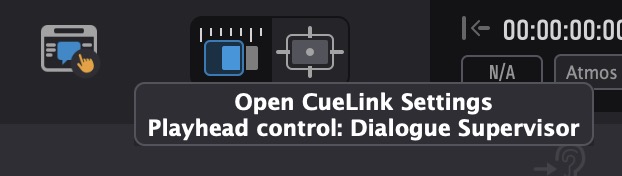
Only one device can hold control at a time; pressing E again releases it.
Whenever the engineer starts playback, rehearsal or recording in Cue Pro, control returns to Cue Pro automatically and cannot be taken while the transport is running.
Selecting cues, editing cue fields, toggling Done or Enabled, deleting and creating cues do not require Playhead Control, so an edit in progress is never lost when Cue Pro takes over playback.
Navigating the Timeline
The zoom slider in the top left corner zooms the timeline horizontally, as do the R and T keys, a pinch gesture, or Command & scroll wheel. Shift & scroll wheel scrolls the timeline horizontally.
With Playhead Control, clicking or dragging in the timecode ruler moves Cue Pro's playhead, and clicking a cue moves the playhead to the start of that cue.
While the device is linked to Cue Pro, the Timeline View follows the playhead during playback, paging ahead the way a DAW does. Unlinking with Option & L stops the following so the timeline can be browsed freely; linking again brings the playhead back into view. The Go To and Filter controls work in the Timeline View as well, and with Playhead Control, choosing a cue in Go To also moves the playhead to it.
Character Tracks
Each track header shows the character's thumbnail and name together with a progress badge. The badge counts cues by default; the toggle next to the zoom slider switches it to counting words, which is useful for judging the remaining workload of a session. The badge turns green when everything on the track is done.
Tracks can be reordered by dragging their headers, and resized by dragging the divider below a header. Tracks snap to either a compact height or a full height. The order, heights and zoom are remembered on the device.
The button on the right of each track header shows or hides the character's detection symbol lane below the track. This is a view setting of the device only; the lanes shown in Cue Pro or on other devices are not affected. Hovering over a detection symbol shows its name.
Editing Cues in the Timeline
Clicking a cue selects it; Shift-click adds further cues to the selection or removes them again, and with Playhead Control the playhead jumps to the start of the earliest selected cue. Clicking an empty area of the timeline clears the selection. Disabled cues are drawn in grey.
With Playhead Control, dragging a cue moves it, and dragging it onto another track assigns it to that character. Holding Control while dragging keeps the timing and only changes the track. Dragging the left or right edge of a cue retimes its In or Out Point. The picture follows every drag, so cue boundaries can be positioned visually.
Anchors are edited as in Cue Pro: holding Shift while hovering over the cue text shows the insertion point at the nearest word boundary (add Option for character boundaries), and Shift-clicking adds an anchor there. Dragging an anchor moves it with the playhead following, Option-clicking an anchor deletes it, and Control & Shift-clicking snaps it to the playhead.
Right-clicking a cue opens a menu with Edit, Mark as Done, Enable or Disable, Merge and Delete, each applied to the whole selection. Delete or Backspace also deletes the selected cues.
Double-clicking a cue, or choosing Edit from the menu, opens the Edit Event window with the same fields as Cue Pro's own Edit Event window: character, text, notes, engineering notes, Pre-Roll duration and colour, cue number, FN region, reason, on/off screen, TBW, B&E, and the Event Enabled and Recording Done switches. The Alt Text field is shown read-only.
Creating Cues
Pressing A (or Option & N, or clicking the Add Event button in the header) opens the Add Event window, offering the full field set of the Edit Event window plus the In and Out timecodes, preset to the playhead position with a two-second duration. With Playhead Control, dragging the In or Out timecode scrubs the picture. Creating a cue does not require Playhead Control.
Merging Cues
To merge cues, select two or more with Shift-click, right-click and choose Merge. The cues are joined into one in timeline order, with the text concatenated and the anchors preserved, exactly as Cue Pro's own Merge Selected Events command does. Playhead Control is required.
Splitting a Cue
To split a cue, select it, place the playhead where the cut should be and press B. This is Cue Pro's split command in Target Event Mode, performed from the browser.
If the cue has text, the Split Event window asks where the text of the second cue should begin. Click the character, or use the ← and → keys, then press Enter or click Split. When the playhead sits between two anchors, the split position is limited to the text between them, shown in white; the rest is greyed out. If that range is a single character (a pause between anchors), the cue is split without asking.
The resulting cues are numbered as configured in Cue Pro, and the split can be undone from the transport bar like any other edit.
Undo and Redo
The Undo and Redo buttons in the transport bar take back and repeat the edits made from the current device. Edits made in Cue Pro or from other devices are not affected; those are undone where they were made.
Keyboard Shortcuts
The keyboard button in the header opens a cheat sheet of all shortcuts and gestures available in CueLink, grouped into transport, timeline view, cues and anchors.
Controls
The CueLink interface includes four primary control elements at the top of the window: Link, Go To, Filter, and Logout.

Link
When enabled, Link keeps the event list synchronised with the currently selected event in Cue Pro. Independent navigation through other events is not possible while Link is enabled - the Filter and Go To buttons are disabled to ensure the current cue stays in view.
To toggle Link on or off, click the Link button or press Option & L.
While linked, the event list automatically follows Cue Pro's playhead during playback, keeping the current cue in view regardless of the overlay mode. For details on how following interacts with filters, cue selection and record modes, see the Following the Playhead section below.
Note: Auto-scroll is automatically paused while editing an In or Out timecode (see the Editing ADR Cue Fields section), so the list does not jump during an edit.
With Link disabled, the event list can be navigated freely by scrolling, or by using the ↑ and ↓ keys. For any users with Match Filters enabled in Cue Pro, disabling Link temporarily bypasses the filter, showing all characters - this allows searching all characters or setting manual filters while temporarily unlinked.
Re-enabling Link re-syncs the view to the current event in Cue Pro. For users with Match Filters enabled, any manually set filters will revert to follow the filters set in Cue Pro.
Go To
Go To is available when Link is disabled, and allows events to be located by cue number or text.
To activate, click the Go To button or press Option & G. This opens the Go To search window.
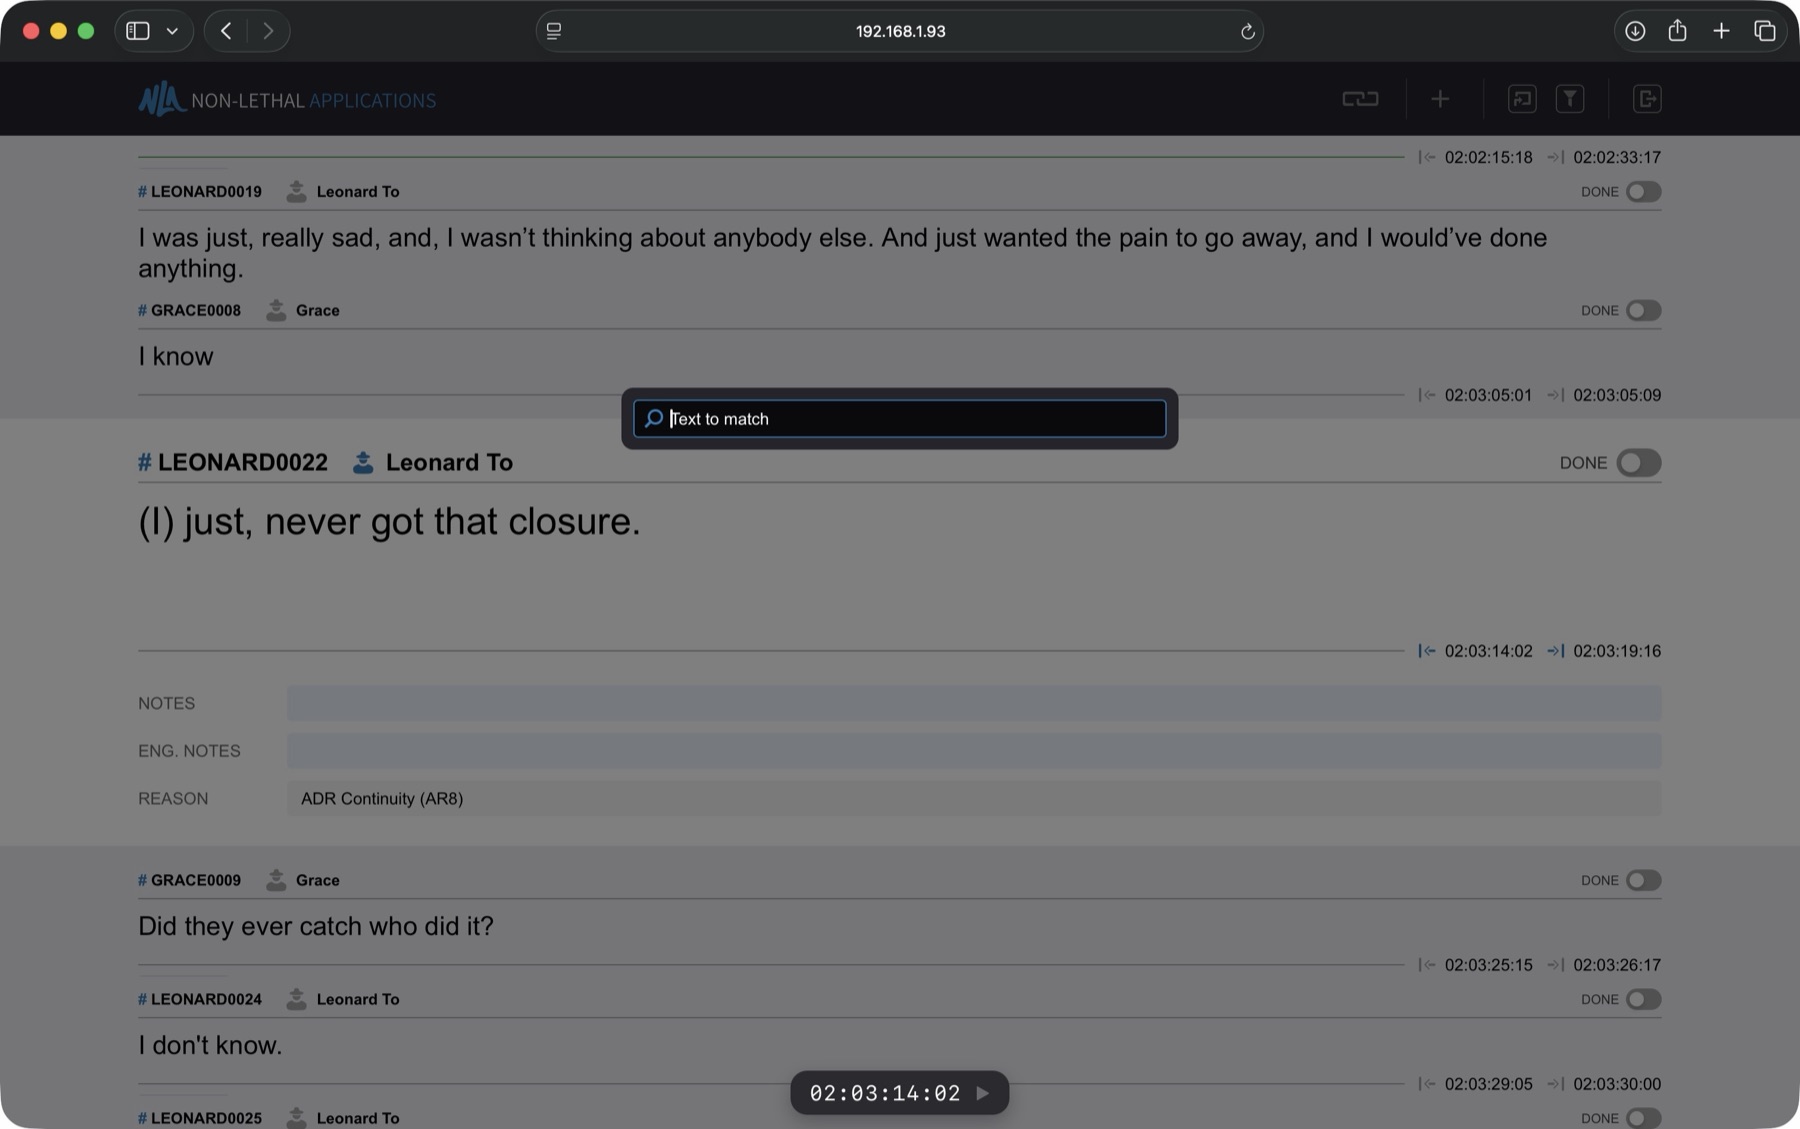
As the search term is typed, matching results are displayed. Click on the desired event to navigate to it. To cancel, click anywhere outside of the search box. To return to the current event, enable Link again.
Filter
If the Match Filters option has not been enabled for the current user in Cue Pro, custom filters can be set to view events for specific characters or actors. This is also temporarily possible for users with Match Filters enabled when Link is disabled.
To open the filter, click the Filter button or press Option & F.
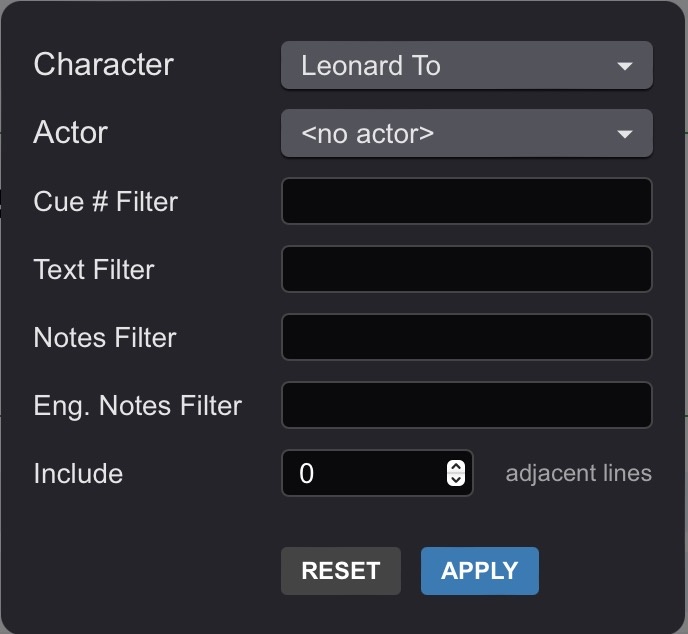
Enter or select the desired filters and click APPLY. If the Match Filters option has been enabled for the current user in Cue Pro, the Filter will always follow what is set in Cue Pro and the Filter button will not be accessible.
Logout
To log out, click the Logout button. The Login window will be presented. As a precautionary security measure, users are automatically logged out after 12 hours of connection.
Following the Playhead
During playback, the CueLink event list automatically follows Cue Pro's playhead, keeping the current cue centred in the list so that everyone in the session sees the cue being worked on without scrolling manually. Following is automatic while the device is linked to Cue Pro - there is no separate setting to enable it.
The current cue is the cue whose In and Out Points bracket the playhead. When the playhead sits in a gap between cues, the list centres on the next cue. Before the first cue, the list holds on the first cue; once the playhead reaches or passes the last cue's In Point, it holds on the last cue. The list therefore always shows a cue and never scrolls to an empty position.
When a filter is applied on the device, the list follows the playhead through the filtered cues only. Each linked device can apply its own filter, so the cues one device scrolls through can differ from another device and from Cue Pro's own selection.
When no filter is applied and one or more cues are selected in Cue Pro, the way the list follows the playhead depends on the Event Record Mode set in Cue Pro. In Single and Single w/ open end, the list scrolls only within the selected cues - it never scrolls to a cue that is not selected. In Batch, the list follows the playhead across all cues, regardless of the selection. The Event Record Mode is set in Cue Pro by right-clicking the Record button in the Controller Bar - changing it updates the following behaviour on all linked devices immediately.
When a device is unlinked, the list stops following the playhead and stays where it is. The list can then be browsed freely while playback continues in Cue Pro. The list does not scroll while a user is editing a cue's text or fields.
Scribble
Available in: Cue Pro Edit and Cue Pro Studio, for users with their Role set to Viewer
CueLink Scribble allows hand-drawn annotations directly on top of a cue's text - the same way a paper script might be annotated during a session. This is particularly useful for voice talent who want to add their own performance markings such as inflection cues, pitch reminders, emphasis marks or breathing points while they are performing.
A drawing toolbar appears alongside the cue text with three tools and a colour picker:
Pen - an opaque ballpoint-style stroke for handwritten notes and precise marks.
Marker - a broad, semi-transparent highlighter-style stroke for emphasising existing text.
Eraser - removes previously drawn strokes.
Scribble requires a stylus input device such as Apple Pencil on iPad or a stylus on Windows touch devices such as Surface or Wacom. Finger touch input is not supported.
Note: Scribble strokes are stored locally in the browser on the device that created them - they are not shared with other CueLink users or with Cue Pro, and are not saved with the project. Closing the browser tab or reloading the page will clear the drawings. Scribble is intended for in-session use only and should not be relied upon for markings that need to persist beyond the current recording session.
Editing ADR Cue Fields
Available in: Cue Pro Studio
Users with their Role set to Editor in Cue Pro can edit cue fields directly from the browser. Any changes made are forwarded to Cue Pro and updated immediately on the ADR Cue video overlays. All other connected CueLink users see the changes appear automatically.
Text
To modify the Text of an ADR Cue, click on the Text field and start typing.
To confirm the changes, click the CONFIRM button or press Option & Enter.
To discard the changes, click the DISCARD button.
Notes
To modify the Notes field of an ADR Cue, click on the Notes field and start typing.
To confirm the changes, click the (tick) button or press Option & Enter. To discard, click the X button.
Engineering Notes
To modify the Engineering Notes field of an ADR Cue, click on the Engineering Notes field and start typing.
To confirm the changes, click the (tick) button or press Option & Enter. To discard, click the X button.
Done
The Done switch on each cue can be toggled on or off by clicking it. The same Done state appears in Cue Pro's Event List, allowing directors and editors to track which cues have been recorded.
For Viewer users, the Done switch is visible in a read-only state.
In and Out Timecodes
Editors can adjust the In and Out timecode of existing cues directly from CueLink. Click on a cue's In or Out timecode to open a small popover with two ways to enter a new value:
Type directly into the timecode field in HH:MM:SS:FF format, or click and drag horizontally on the timecode to scrub frame by frame. A short initial drag distance is required before the value begins to change, preventing accidental adjustments. While dragging, the video scrubs in real time on the connected display, allowing the In or Out point to be positioned visually rather than by timecode alone. The scrub signal travels from the browser through the CueLink server to Cue Pro and on to Pro Tools.
The In point cannot be moved beyond the Out point, and vice versa. If the cue contains anchors, neither point can be moved past them.
When the change is confirmed, CueLink forwards the new timecode to Cue Pro, which updates the event timing in the active Timeline. The change propagates to all other connected CueLink users.
Note: While the In/Out popover is open, auto-scroll is paused - moving the playhead in Cue Pro during the edit will not move the cue out of view.
Creating a New ADR Cue
Users with their Role set to Editor can create new ADR Cues directly from CueLink. To add a cue, click the + New Line button in the header, or press Option & N. The Add Event modal opens with the In timecode set to Cue Pro's current playhead position and a default duration of 2 seconds.
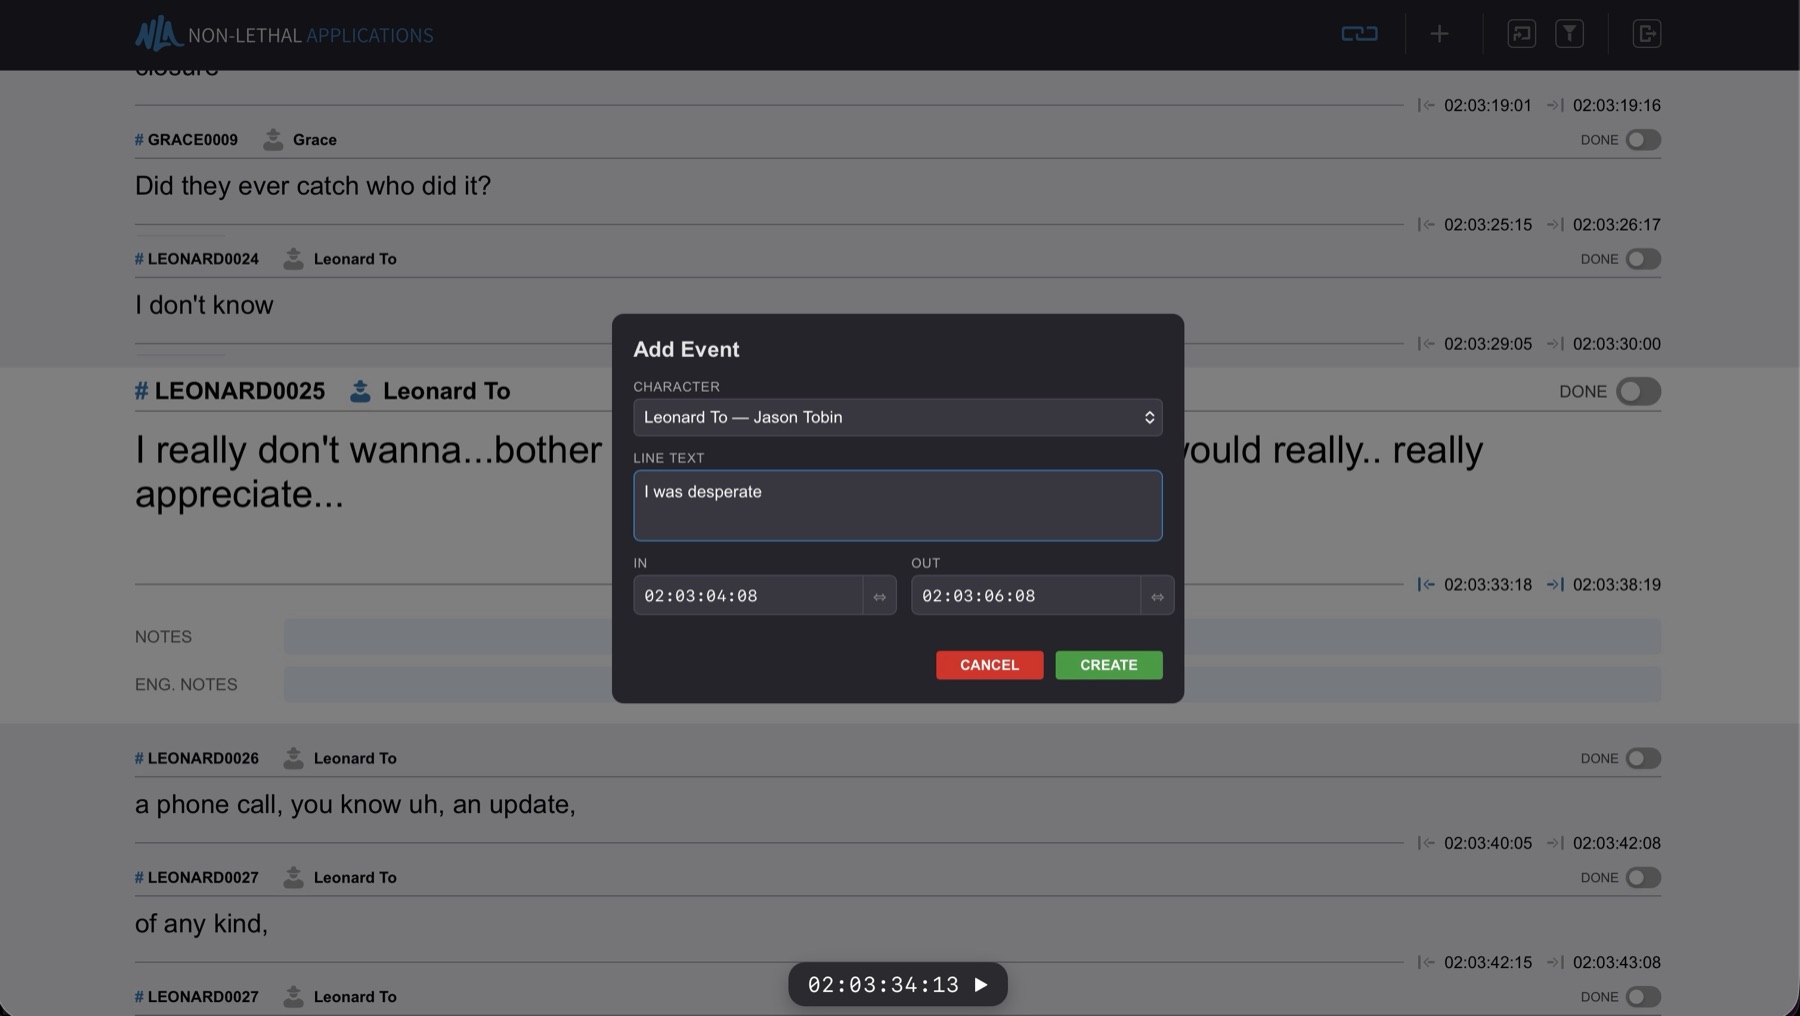
Select the character from the available characters in the session, type the cue text, and adjust the In and Out timecodes if needed. As with editing existing cues, clicking and dragging on the In or Out timecode scrubs the video in real time, making it possible to define the cue boundaries visually from the browser. Click Create to add the cue.
CueLink forwards the new cue to Cue Pro, which creates the event in the active Timeline. All other connected CueLink users see the new cue appear in their event list automatically.
Note: The + New Line button and Option & N shortcut are only available to Editor users.
Transport Bar
Available in: Cue Pro Studio
A floating transport bar is displayed for users with the Editor role, showing what Cue Pro is doing in real time:
The Timecode Counter displays the current timecode in a large, monospaced format, using the active Timeline's timecode settings (drop-frame or non-drop-frame as appropriate). The counter updates smoothly in real time, mirroring Cue Pro's playhead as the Timeline plays.
A State Indicator shows whether Cue Pro is in Play, Record, Rehearse, or Review mode. A Pass-State Badge is also visible during record, rehearse, and review passes.